
Design thinking revolves around developing a deep understanding of your end-user to support you in creating a product that aligns with their needs (Dam & Siang, 2018). It is human-centred, hands on and is a solution-based approach to solving problems.
When I started my career in learning and development, I saw the initiatives that we launched and the programs that we designed as ‘projects’ that needed to be ticked off the ‘to-do’ list. As time went on, I started to look out into the world for how I could provide the best experience for the learners. I didn’t just want to tick a project off the list, I wanted to make a difference and design a meaningful experience for the learner. When I came across design thinking, I am not going to lie, I was excited. I felt like design thinking provided me with a process that I could use to put my users at the heart of the design. I wasn’t going to continue just ticking ‘projects’ off my list, I was going to ‘solve problems’. It was time to not only be a learning experience designer but a problem solver.
There are many versions of the design thinking process in use today, however, for the purpose of this blog, the five-phase model proposed by the Hasso-Plattner Institute of Design at Stanford (also known as d.school) will be explored.
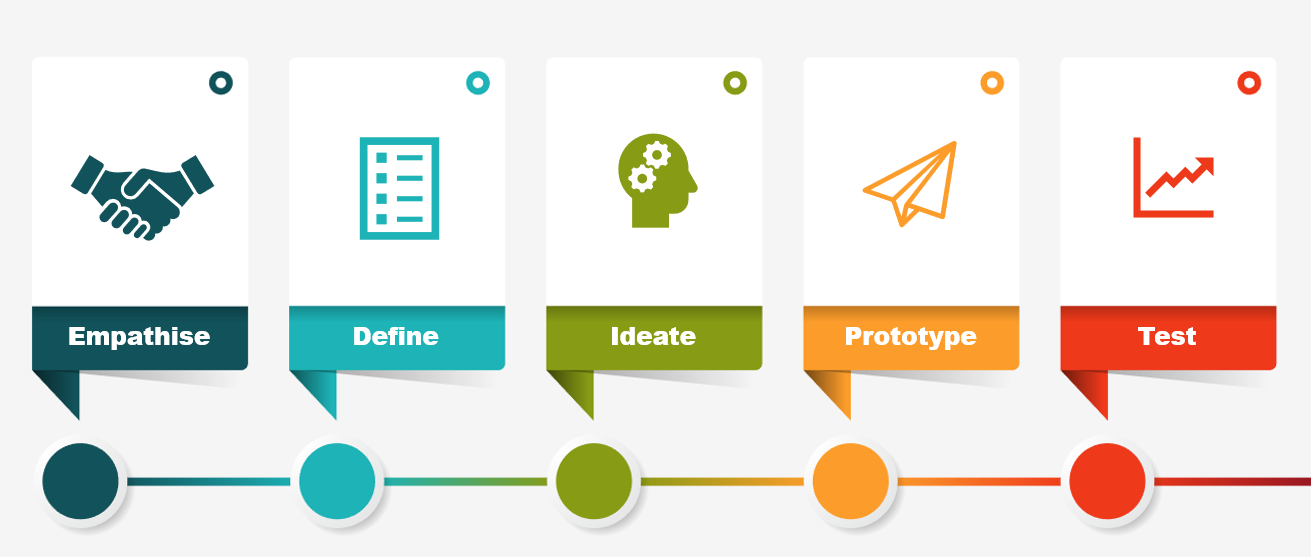
According to d.school the five phases of design thinking are:
1. Empathise with your users.
2. Define your users’ needs, their problem and your insights.
3. Ideate by challenging assumptions and creating ideas for innovative solutions.
4. Prototype to start creating solutions.
5. Test solutions.
(Dam & Siang, 2018).
Let’s explore each phase of design thinking and discuss how each can be used for the process of designing an eLearning solution.
1. Emphasize: with your users.
“To create meaningful innovations, you need to know your users and care about their lives” (Hasso Plattner Institute of Design at Stanford, 2010).
The empathise phase is where you spend time developing a deep understanding of the people that you are designing for. This involves understanding what their needs and wants are, what they do, why they do it and what their day to day life looks like. Basically, it means stepping into their shoes and seeing the world from their eyes.
This means that when you are designing an eLearning solution, you are not just designing a solution that you or the project team believes will be meaningful, you are discovering what is meaningful for the end-user and putting that at the core of your design. Here are some ways to gain an understanding of your end-user (I have also included some useful resources that we use at Belvista Studios):
- Interviewing the end-user: Check out this blog on conducting successful user interviews to get the information that you need. Access the blog here.
- Observing the end-user in their environment: This involves observing the end-user in their day-to-day environment to gain an understanding of their world.
- Creating a user persona: This YouTube video is great at explaining what user personas are and how to create them. Access the YouTube video here. Also check out this free persona building tool here.
2. Define: your user’s needs, their problem and your insights.
“Framing the right problem is the only way to create the right solution” (Hasso Plattner Institute of Design at Stanford, 2010).
The define phase involves gathering all of the information that you have collected from the empathise phase and using it to define your problem (Dam & Siang, 2018). This stage brings clarity and focus to the design space (Hasso Plattner Institute of Design at Stanford, 2010) so you know that you are solving the right problem.
A great way to do this is by bringing your project team together to discuss key themes and findings. Put the key themes up on a wall and have the project team write their findings on sticky notes and stick them against their appropriate theme.
If possible, we suggest having a couple of end-users involved in this process. Their insight can be valuable at this stage of the process and it is also more likely that the problem defined will be based on their needs rather than the assumptions of the project team.
Use the key themes and findings to come up with a problem statement which will be the core of the design process. For example, your problem statement may be, “Increase employee understanding of products in order to raise customer service satisfaction ratings by 20% over the next 12 months.”

3. Ideate: by challenging assumptions and creating ideas for innovative solutions.
“It’s not about coming up with the ‘right’ idea, it’s about generating the broadest range of possibilities” (Hasso Plattner Institute of Design at Stanford, 2010).
In this phase you are ready to start generating ideas. You now understand your user’s needs and have created a human-centred problem statement from your findings.
Ideation involves brainstorming a variety of possible solutions to the problem. There are many ways that you can do this. To increase creativity and idea generation you can add constraints and incorporate inspiring materials.
At Belvista Studios we practice rapid brainstorming for ‘how might we’ questions. For example, if our problem statement was, “Increase employee understanding of products in order to raise customer service satisfaction ratings by 20% over the next 12 months” we would create the following ‘how might we’ question.
How might we increase employee understanding of products?
Using the information that we have collected, we set a timer and the team writes down as many solutions as possible to the problem (no matter how weird, wacky or obvious they may be). Quantity of ideas is key to this process. Even if an idea isn’t the right solution, it may spark other ideas that could lead you down a very useful and insightful path.
From this process you will have a list of possible solutions to your problem that you can then prioritise. Have the participants discuss and vote on the solutions that they see being most fit for purpose. You can then begin to prototype and test these solutions, which brings us to the next phase.
4. Prototype: to start creating solutions.
“Build to think and test to learn” (Hasso Plattner Institute of Design at Stanford, 2010).
Prototyping is a way of testing a new idea or concept (Ballantyne & Farrer, 2011). It is a small scale-mock up version of the final product. You can share this prototype with the project team and end-user to ensure that it meets its purpose.
For your eLearning project this could involve creating a few sample screens to show the client/end-user how the product will look/function.
At Belvista Studios we ensure that we provide the client/end-user with a sample of how the project will look prior to getting too far down the track. This involves approval of the look and feel of the course, the storyboard that is used for development and that it will function in their environment (e.g. will it work with their LMS?).
Remember:
- Build with the user front of mind (Hasso Plattner Institute of Design at Stanford, 2010).
- Don’t spend too long on a prototype. You don’t want to waste time or become emotionally attached to the project before you know the client/end user is happy with it and that it meets their needs.
5. Test: solutions.
“Testing is an opportunity to learn about your solution and your user” (Hasso Plattner Institute of Design at Stanford, 2010).
Testing involves yourself, the project team and the end-user rigorously testing the solution that has been created. This phase allows you to narrow down your solution to a finely tuned result (Trobaugh, 2017). In turn allowing you to create a solution that best meets the needs of your end-user.
At Belvista Studios we put great effort into our quality assurance (QA) process, which allows us to effectively test our solutions. If you want to know more about how to QA your project, we have shared our QA process via this blog here.
That’s it for this blog on using the design thinking process for eLearning design. At Belvista Studios we find that using design thinking processes for our learning solutions has a significant positive outcome on what we deliver, and our clients say the same. I hope that you can use these processes to improve your design process and create courses that align to your user’s needs. If you use design thinking for your learning solutions, we would love to hear about it!
References
Ballantyne, P., & Farrer, R. (2011). What is Prototyping. Retrieved from https://www.nesta.org.uk/blog/what-is-prototyping/.
Dam, R., & Siang, T. (2018). What is Design Thinking and Why Is It So Popular? Retrieved from https://www.interaction-design.org/literature/article/what-is-design-thinking-and-why-is-it-so-popular.
Hasso Plattner Institute of Design at Stanford. An Introduction to Design Thinking Process Guide [PDF file]. Stanford. Author. Retrieved from https://dschool-old.stanford.edu/sandbox/groups/designresources/wiki/36873/attachments/74b3d/ModeGuideBOOTCAMP2010L.pdf.
Hubspot, Inc. (2018). Make My Persona. Retrieved from https://www.hubspot.com/make-my-persona.
Smith, R. [Robert Smith]. (2017, October 5). UX Tutorial | How To Create User Personas [Video File]. Retrieved from https://www.youtube.com/watch?v=vZ578SqL1oA.
Trobaugh, S. (2017). Design Thinking: Prototyping and Testing (Part 3). Retrieved from https://www.godfrey.com/insights/creative/make-ideas-great-with-protoyping-and-testing.
“Framing the right problem is the only way to create the right solution” (Hasso Plattner Institute of Design at Stanford, 2010).
The define phase involves gathering all of the information that you have collected from the empathise phase and using it to define your problem (Dam & Siang, 2018). This stage brings clarity and focus to the design space (Hasso Plattner Institute of Design at Stanford, 2010) so you know that you are solving the right problem.
A great way to do this is by bringing your project team together to discuss key themes and findings. Put the key themes up on a wall and have the project team write their findings on sticky notes and stick them against their appropriate theme.
If possible, we suggest having a couple of end-users involved in this process. Their insight can be valuable at this stage of the process and it is also more likely that the problem defined will be based on their needs rather than the assumptions of the project team.
Use the key themes and findings to come up with a problem statement which will be the core of the design process. For example, your problem statement may be, “Increase employee understanding of products in order to raise customer service satisfaction ratings by 20% over the next 12 months.”
3. Ideate: by challenging assumptions and creating ideas for innovative solutions.
“It’s not about coming up with the ‘right’ idea, it’s about generating the broadest range of possibilities” (Hasso Plattner Institute of Design at Stanford, 2010).
In this phase you are ready to start generating ideas. You now understand your user’s needs and have created a human-centred problem statement from your findings.
Ideation involves brainstorming a variety of possible solutions to the problem. There are many ways that you can do this. To increase creativity and idea generation you can add constraints and incorporate inspiring materials.
At Belvista Studios we practice rapid brainstorming for ‘how might we’ questions. For example, if our problem statement was, “Increase employee understanding of products in order to raise customer service satisfaction ratings by 20% over the next 12 months” we would create the following ‘how might we’ question.
How might we increase employee understanding of products?
Using the information that we have collected, we set a timer and the team writes down as many solutions as possible to the problem (no matter how weird, wacky or obvious they may be). Quantity of ideas is key to this process. Even if an idea isn’t the right solution, it may spark other ideas that could lead you down a very useful and insightful path.
From this process you will have a list of possible solutions to your problem that you can then prioritise. Have the participants discuss and vote on the solutions that they see being most fit for purpose. You can then begin to prototype and test these solutions, which brings us to the next phase.
4. Prototype: to start creating solutions.
“Build to think and test to learn” (Hasso Plattner Institute of Design at Stanford, 2010).
Prototyping is a way of testing a new idea or concept (Ballantyne & Farrer, 2011). It is a small scale-mock up version of the final product. You can share this prototype with the project team and end-user to ensure that it meets its purpose.
For your eLearning project this could involve creating a few sample screens to show the client/end-user how the product will look/function.
At Belvista Studios we ensure that we provide the client/end-user with a sample of how the project will look prior to getting too far down the track. This involves approval of the look and feel of the course, the storyboard that is used for development and that it will function in their environment (e.g. will it work with their LMS?).
Remember:
- Build with the user front of mind (Hasso Plattner Institute of Design at Stanford, 2010).
- Don’t spend too long on a prototype. You don’t want to waste time or become emotionally attached to the project before you know the client/end user is happy with it and that it meets their needs.
5. Test: solutions.
“Testing is an opportunity to learn about your solution and your user” (Hasso Plattner Institute of Design at Stanford, 2010).
Testing involves yourself, the project team and the end-user rigorously testing the solution that has been created. This phase allows you to narrow down your solution to a finely tuned result (Trobaugh, 2017). In turn allowing you to create a solution that best meets the needs of your end-user.
At Belvista Studios we put great effort into our quality assurance (QA) process, which allows us to effectively test our solutions. If you want to know more about how to QA your project, we have shared our QA process via this blog here.
That’s it for this blog on using the design thinking process for eLearning design. At Belvista Studios we find that using design thinking processes for our learning solutions has a significant positive outcome on what we deliver, and our clients say the same. I hope that you can use these processes to improve your design process and create courses that align to your user’s needs. If you use design thinking for your learning solutions, we would love to hear about it!
References
Ballantyne, P., & Farrer, R. (2011). What is Prototyping. Retrieved from https://www.nesta.org.uk/blog/what-is-prototyping/.
Dam, R., & Siang, T. (2018). What is Design Thinking and Why Is It So Popular? Retrieved from https://www.interaction-design.org/literature/article/what-is-design-thinking-and-why-is-it-so-popular.
Hasso Plattner Institute of Design at Stanford. An Introduction to Design Thinking Process Guide [PDF file]. Stanford. Author. Retrieved from https://dschool-old.stanford.edu/sandbox/groups/designresources/wiki/36873/attachments/74b3d/ModeGuideBOOTCAMP2010L.pdf.
Hubspot, Inc. (2018). Make My Persona. Retrieved from https://www.hubspot.com/make-my-persona.
Smith, R. [Robert Smith]. (2017, October 5). UX Tutorial | How To Create User Personas [Video File]. Retrieved from https://www.youtube.com/watch?v=vZ578SqL1oA.
Trobaugh, S. (2017). Design Thinking: Prototyping and Testing (Part 3). Retrieved from https://www.godfrey.com/insights/creative/make-ideas-great-with-protoyping-and-testing.


0 Comments
We'd love to hear from you. Send us a message and connect!
Emoji